To create an assessment queue:
- Visit the landing page for either Equipment or Locations
- Create any filter on the Landing Page. A “Save Filtered as Queue” will appear.
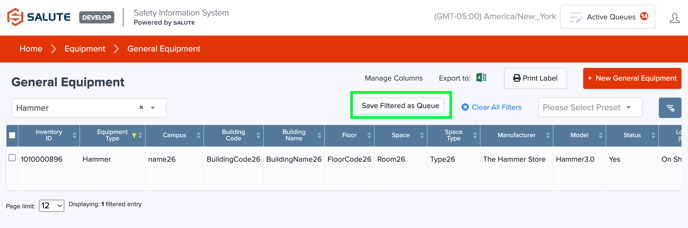
- Select “Save Filtered As Queue” to create a new Assessment Queue
- You will be redirected to a New Assessment Queue page
- From the New Assessment Queue page, you can define:
- User Group: Define the group of users that will have access to this Assessment queue (if applicable)
- Label: Provide an easy-to-remember label that is consistent with the best practices established by your organization
- Inspector: Determine who will be responsible for conducting the Assessments in the Queue. This must be one person, but this can be anyone within your organization as long as they have been given the appropriate access by an Admin user. (Contact an Admin within your organization to determine if this user has the right level of access)
- Due Date: Determine the date by which all assessments in the Queue should be complete
- Pre-populate answers: If selected, the questions on the checklist will default to Yes, or if a dropdown, they will default to the first value. This is used when there is a large volume of assessments and the Inspector is primarily validating that everything was done
- Default Assessment Types: For each type of item in the Queue, define which Assessment Type should be used.
- This can be the same Type if all items are similar, or different if you have multiple equipment types within the same queue
- Queries: Displays the filters that were applied to generate the list of items within the assessment queue
- Tabs
- Pending: A list of items where the Assessment has not yet been started
- Draft: A list of items where the assessment has been started and saved as draft
- Completed: A list of the items where the Assessment has been completed and finalized
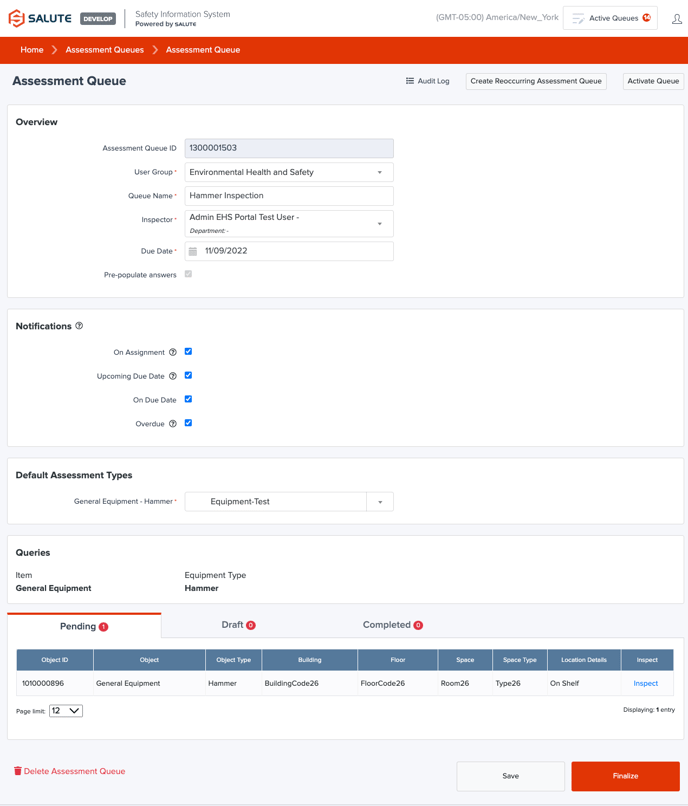
- Once the Assessment queue has been saved, the user can then begin the assessments by selecting Inspect in the left-hand column
- When the assessment is completed, the user may Finalize the assessment queue to remove it from their task list (see Tasks for more detail)
Creating a Recurring Queue
Once an Assessment Queue has been created, a user is able to create a recurring queue to happen at a time interval of their choosing. This is often used for required monthly or annual inspections, which can be assigned months or years in advance to ensure nothing slips through the cracks.
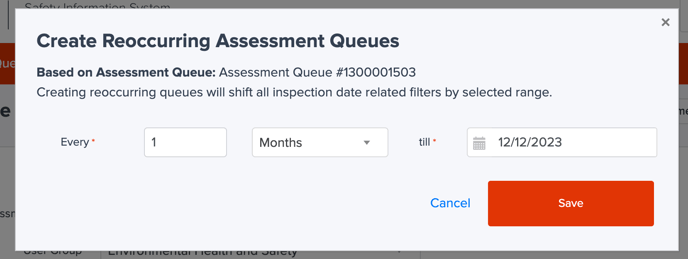
To create a Recurring Queue:
- Select “Create Recurring Assessment Queue” from the menu bar
- The recurrence schedule (e.g., Every 1 Month till 12/12/2023)
- Select Save, and you will be redirected to the Assessment Queue landing page. Simply refresh this page to see all of the items that have been created
Activating an Assessment Queue
When a user is responsible for conducting the Assessment in a Queue, they are able to Activate that Queue by selecting Activate Queue in the upper right-hand corner of the screen. This is used to enable easier access on mobile devices.
When a user has “Activated” a queue, scanning the QR code of any item in that queue will automatically take the user to the Assessment associated with that queue. It can be as simple as scanning, and selecting finalize to complete an entire assessment if the user has set it up that way and no Findings have been identified.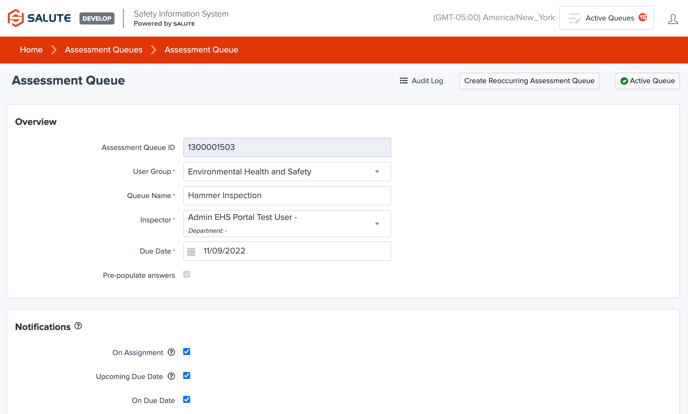
Note: An activated Queue will only change the QR code functionality for that user. To view all active Queues, select the Active Queues list from any screen in the upper right corner.