Course Enrollments
Salute Training Requirement Sync
Users can now be enrolled in courses directly from Salute through the "Update Training Requirements" feature available in Safety Trainings.
A Roster Manager is able to update their Roster Members' Training Requirements from the Community Portal by accessing Employee Roster, selecting the Employee, and clicking "Update Training Needs". 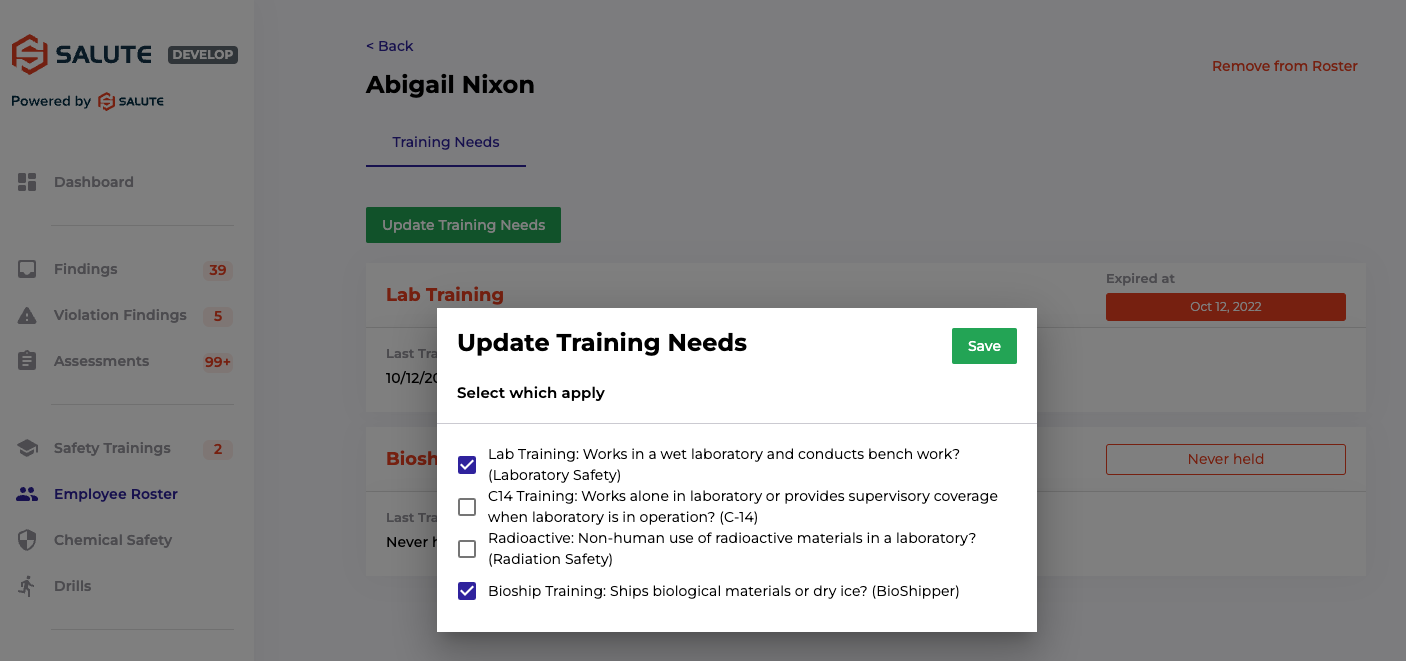
A User with Salute Portal access can also do this by accessing People, selecting the Person desired, selecting "Training Requirements", and "Update Training Requirements". 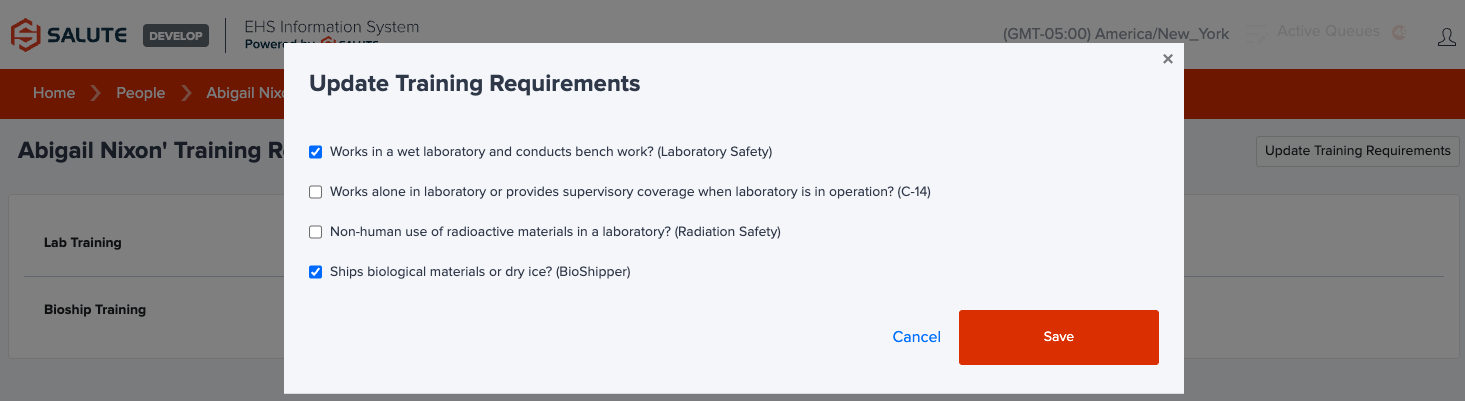
The options available under Update Training Needs can now be configured to correspond with an enrollment in one or multiple LMS courses.
Please work with your Customer Success Representative to configure the course sync.
Self Enrolling into a Course (End User)
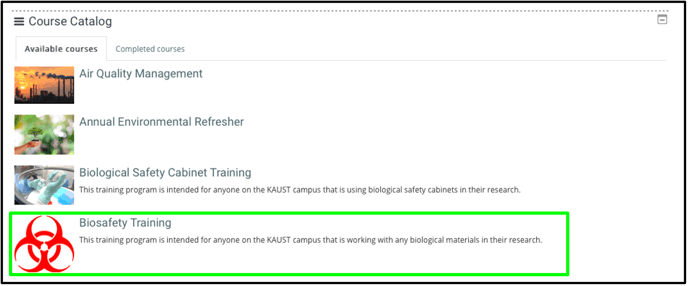
In addition to Profile Based Course Enrollments, you can also self enroll into any Available Course in the Course Catalog.
- Users can self enroll into a Course by browsing the Available Courses and clicking into the course of their choice.
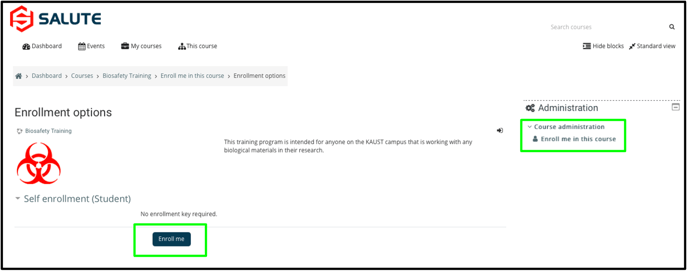
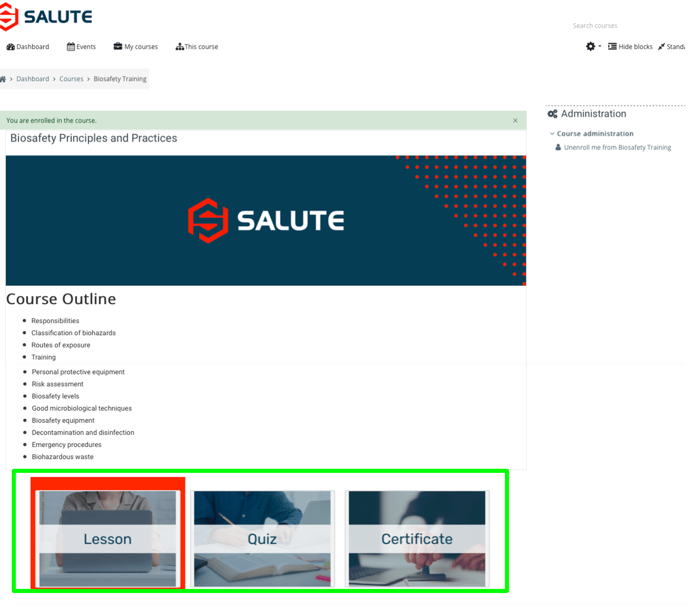
- Once on the Course Landing Page, review the Course Description and choose to enroll by selecting “Enroll me” from the bottom of the page or “Enroll me in this course” from the right hand navigation under Administration > Course administration.
- After enrolling in the course, you will be directed to the Course Page, which will include additional course information and the Course Activities (e.g., Lesson, Quiz, Certificate, etc.). Click into any of the tiles to start the Course Activities. Once all Course Activities and Requirements are met, a Certificate will be generated for Course Completion.
Staff Course Enrollments (LMS Company Manager)
LMS Managers can also manually enroll staff in Courses outside of Profile Based Course Enrollments.
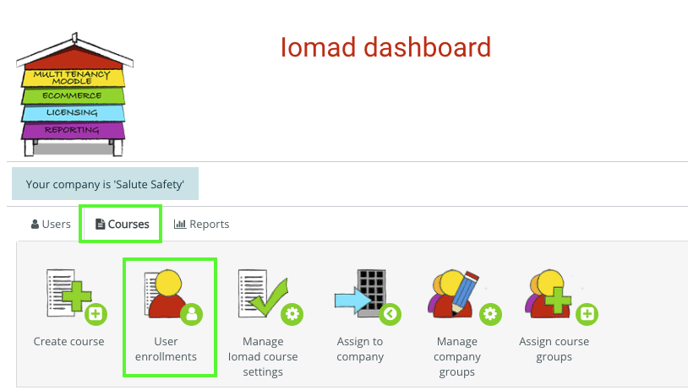
- Navigate to the Courses tab in the IOMAD Dashboard available to those who have LMS Manager permissions.
- Once in the Courses tab, select User Enrollments.
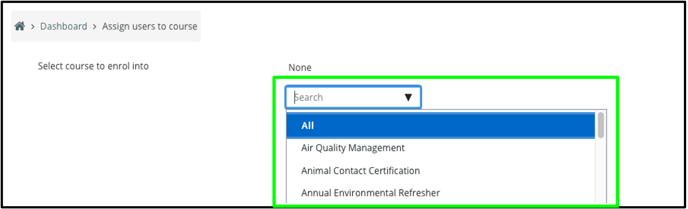
- In the Search field, either search for the desired course name or scroll through the list to find the desired course. NOTE: Multiple courses can be selected at once to manually enroll staff.
- After selecting desired courses for enrollment, search for Users to enroll into the course(s) using the Search function on the bottom right of the window. Search for Users using the right window + search to find desired staff. Select them (multi select is possible by using Shift +) and then select “Enroll”. “Enroll All” will enroll all users populated in the window based on your search. The day and time of the course enrollment email can be adjusted using the “Send Email On” date selector.
NOTE: Search for Users using the search function in the left window to see if they are already enrolled in the course and/or to Unenroll them from the course.
Bulk Enrollments through Upload
- Prepare the import file using the UploadUsers_Enrollment.csv template.

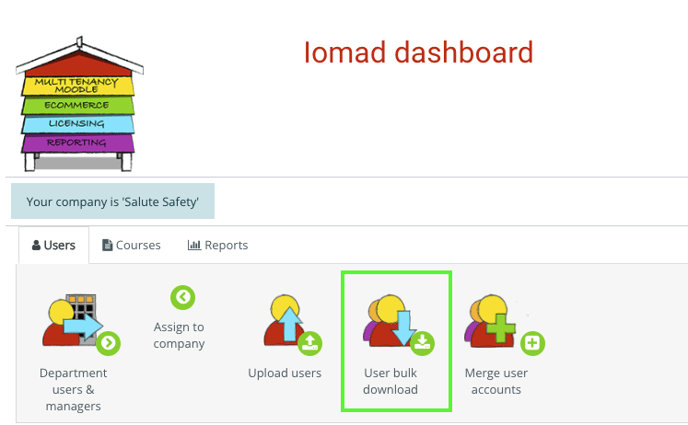
- Username - Username is a unique number that is issued to every user in the LMS. Under the Users tab in the IOMAD Dashboard, use the "User Bulk Download" button to export a full list of users. Usernames are listed in the second column under "username".
- Hint: Use vlookup against email to match the Usernames to the emails in your upload file.
- Firstname - First name of the user as it is listed in the LMS. (This can be checked in the bulk users export as well).
- Lastname - Last name of the user as it is listed in the LMS. (This can be checked in the bulk users export as well).
- Email - Email of the user as it is listed in the LMS. (This can be checked in the bulk users export as well).
- Username - Username is a unique number that is issued to every user in the LMS. Under the Users tab in the IOMAD Dashboard, use the "User Bulk Download" button to export a full list of users. Usernames are listed in the second column under "username".
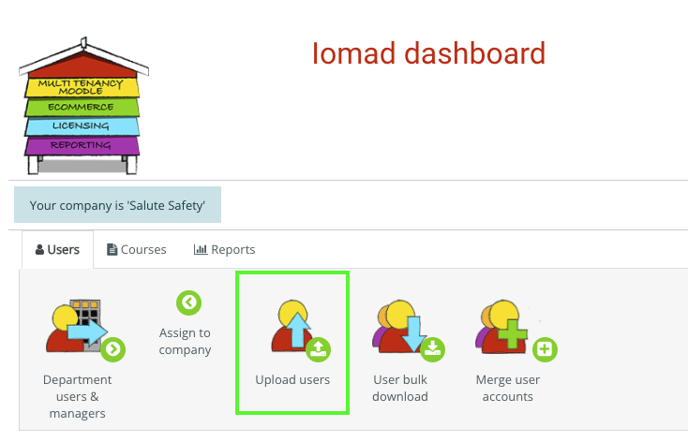
- In the IOMAD Dashboard under the Users tab, select "Upload Users".
- Upload your populated UploadUsers_Enrollment.csv template.
- Keep the CSV delimiter as a comma.
- Ensure that it is uploaded as a CSV in an encoding that matches what is listed in the Encoding dropdown. UTF-8 is the most common encoding for this type of upload.
- Update the preview to as many rows as preferred.
- Set the Upload type to "Update existing users only".
- Update existing users only
ignores any new users found in the upload file and updates the user account if a matching username record is found in the uploaded file.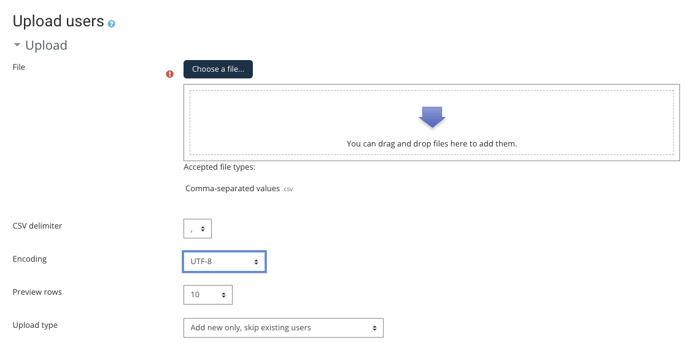
- Update existing users only
- Select Upload users.
- Review the Upload users preview on the following screen. Any exceptions will be flagged here and will need to be addressed before moving forward.
- Under Settings, ensure "Send temporary passwords by email" is "No", and "Existing user details" is "No changes".
-
Under Department, select the courses to enroll the users into.
-
Select Upload Users.
Classroom/In-Person Trainings
Classroom/In-Person Trainings are also known as “Face-to-Face” Trainings in the LMS. These can be a combination of any of the following activities:
- Registration Form
- Training Sign Up (required)
- Quiz
- Certificate
Based on the activities used for the Training, select rules will be applied so that the User cannot access any materials/certificates prior to being marked as having attended the In-Person Training. Likewise, certain rules are applied to ensure that they cannot access Training sign-up until they have accessed the Registration Form.
Users can enroll in any Classroom Training similar to self-enrolling for Online Training. Classroom Training enrollment can also be set up for enrollment based on User Profiles similar to the above sections, if needed.