Creating a New Assessment Type
Please Note: You must be a Salute Admin and/or Salute Portal Group Managers to create a New Assessment Type
- Log into the Salute Portal
- You will automatically be brought to the Dashboard. This is where you will find all available functions of your Salute Safety account
- Locate the Management section on the right side of the screen
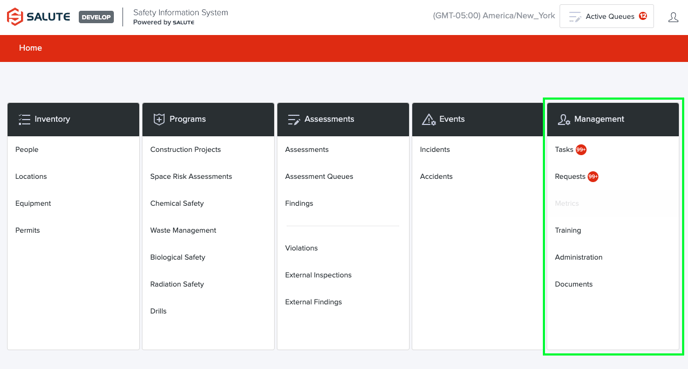
- Here you will find the following options to choose from:
- Tasks
- Requests
- Metrics
- Training
- Administration
- Documents
- Here you will find the following options to choose from:
- Select "Administration"
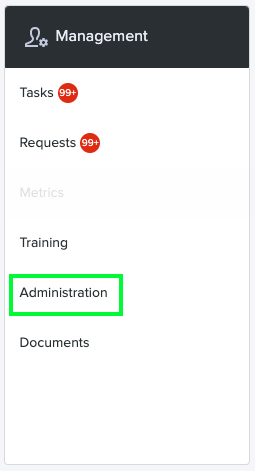
- Here you will find the following options to choose from:
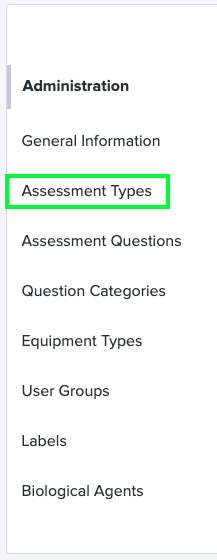
- General Information
- Assessment Types
- Assessment Questions
- Questions Categories
- General Equipment Types
- User Groups
- Labels
- Biological Agents
- Here you will find the following options to choose from:
- Select "Assessment Types"
- Here is where all of the pre-existing Assessment Types will be found
- Locate "+New Assessment Type" in top right of screen and select

- Here is where you can create a New Assessment Type
- Fill out the Overview with the correct information
- Fill out all of the following information:
- Assessment Type Name
- User Group
- Status
- Allow Finding on Community Portal (Checkbox)

- Fill out all of the following information:
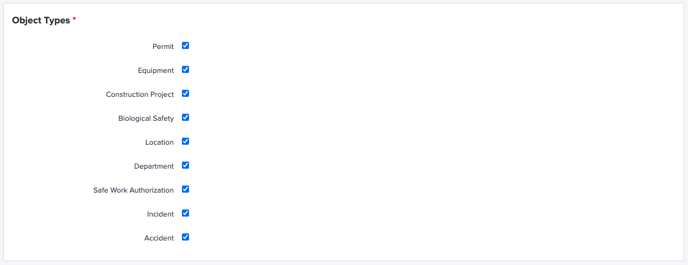
- Locate the "Object Types" section and choose which Object Types this Assessment Type will pertain to
- Locate the "Checklist" section and select "+New Section"
- A pop-up window will general prompting you to select a Category

- A pop-up window will general prompting you to select a Category
- Select the Category you need for the chosen Assessment
- You can add multiple categories into one Assessment later on
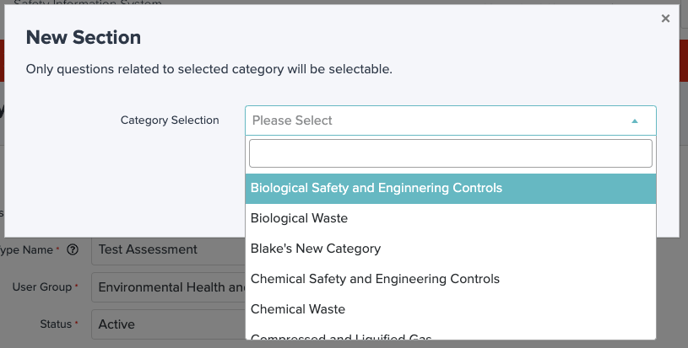
- You can add multiple categories into one Assessment later on
- When the New Selection is selected, add a question by clicking the dropdown arrow in the box that reads "+ Question"
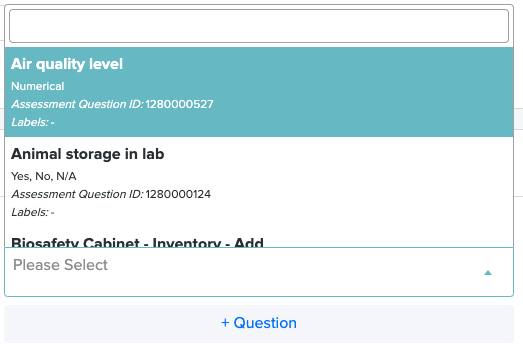
- To help with keeping your questions in the intended order, there is an ID number at the bottom of each question which correlates to the order in which the questions were created in
- If more than 1 question is needed for the section, select "+ Question" and repeat step 9

- Repeat this until all question needed for this section are added
- Repeat step 8 if more than 1 Section is needed for the assessment

- Repeat combination of steps 8, 9, 10 until all sections and questions are added
- Once all of the questions and sections are added, Users have the ability to make the Assessment have nested questions
- Locate "Save" on bottom right of screen and click
- This will save the assessment and it is now ready to use
Adding Conditional Logic to Assessments
- Access the Assessment Type you'd like to apply the logic to.
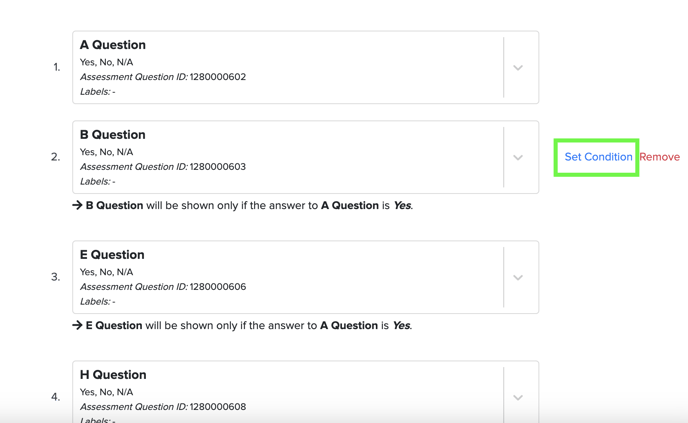
- Find the Question that should conditionally appear.
- Select "Set Condition" to define the condition and apply the logic.
- A "Set Condition" window will appear. Select "Add Condition"
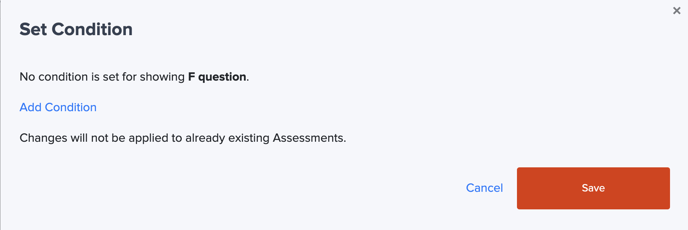
- When you click "Add Condition" a drop down of questions within this Assessment Type will appear. You will define in this dropdown which question already within this Assessment this current question will be based on.
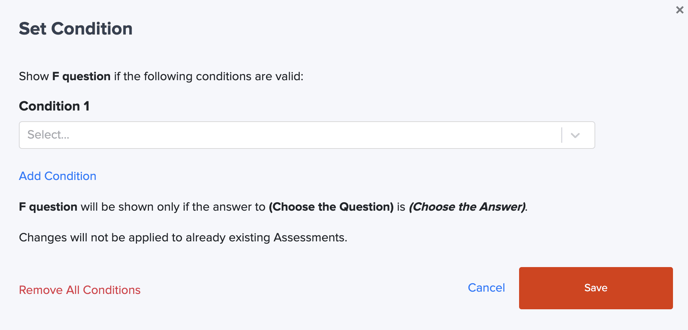
- Once you have selected the question, select the answer required to display the conditional question
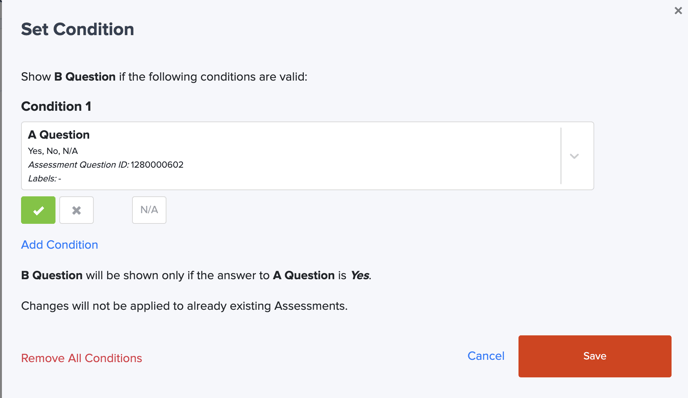
- You will have the option to apply one condition OR multiple conditions as needed. The rules you have set will be displayed toward the bottom of the pop up window.
- If needed, the Remove All Conditions button can be used to completely erase what has been added.
- Ensure to click Save before proceeding.
- Note: Conditional Logic can only be applied to 3 Question Types
- Yes/No/NA
- Range Questions
- Custom Dropdown
- Note: Circular Logic
- The Assessment Tool will not allow for circular logic/logic that will cause an error.
- If circular logic is attempted, a warning banner will be displayed
- Note: Conditional Logic can only be applied to 3 Question Types
For additional information about our platform, please submit a ticket on Support@Salute.