Create a Course from Scratch
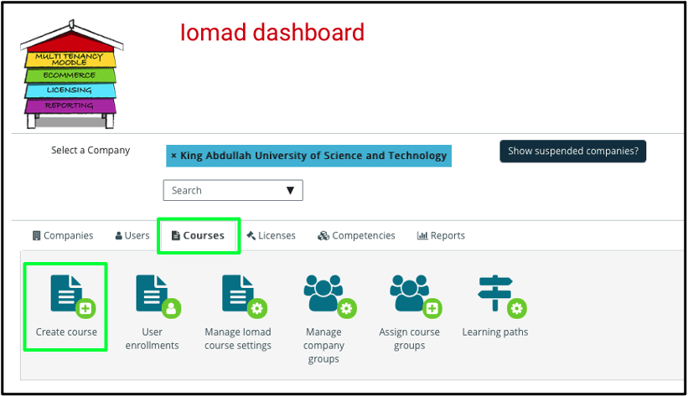
- From the IOMAD Dashboard, select the Courses tab and Create Course.
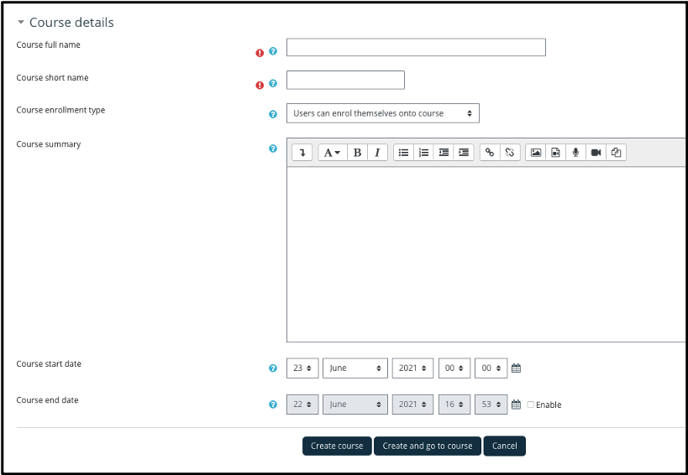
- Follow the prompts to enter relevant Course Detail information, then Create and go to course.
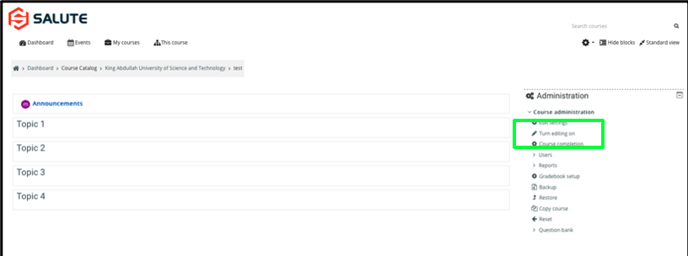
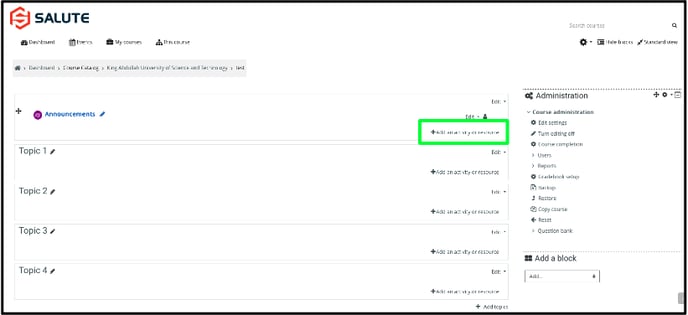
- Below is the blank course editing form, select “Turn Editing On” from the Course Administration menu in the right hand navigation to begin constructing your course.
- Once Editing is on, various editing options will be made available across the blank template. Section Headers and Titles can be edited as needed. Use + Add an activity or Resource to add specific course content.
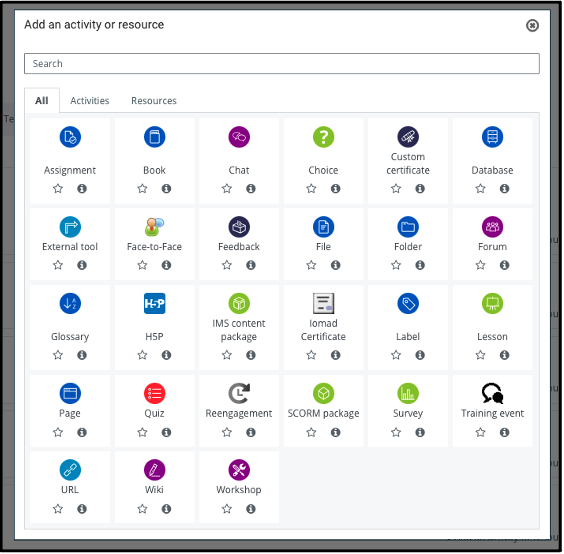
- Once within the + Add an activity or resource pop up window screen, multiple activity or resource types will be available to add onto your course including the most common activities: Lesson, Quiz, Certificate. Upon selecting any of these activities or resources, prompts will direct you to add in your content or provide further detail as needed.
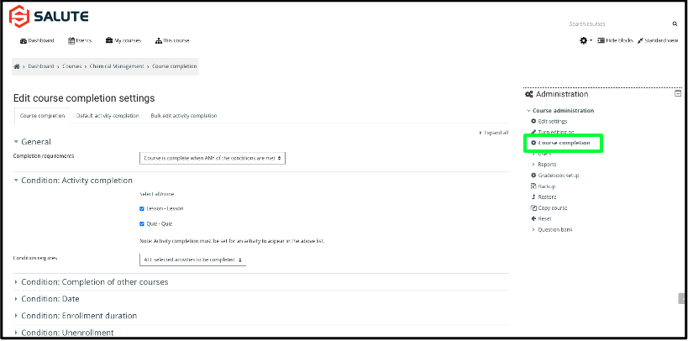
- Once content is added, use the Course Completion settings wheel to determine specific conditions needed within each activity to achieve course completion.
Create a Course by Copying an Existing Course
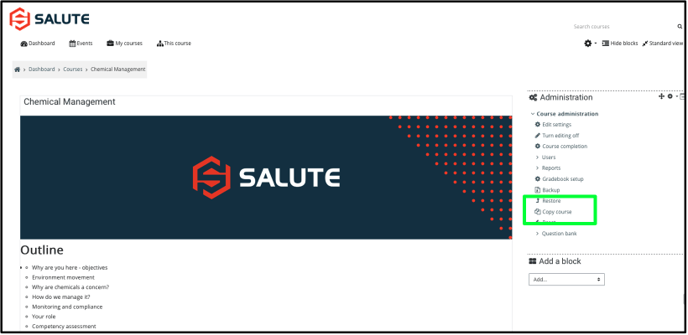
A simpler way to create a course (if a sample course is already available), is to Copy an Existing Course.
- Locate an existing course that has a template you are trying to use for the new course. On the Landing Page for that course, select Copy Course from the right hand navigation to create a duplicate course.
- The Copy Course function will direct to a Copy Course screen where information for the new “copied” course can be added. Once this information is added as appropriate, select Copy and View to start the copy process and begin editing within the copied course.

- The course will take a moment to copy, but once the Status on the right hand side of the In Progress bar is complete, follow the link under Destination to your copied course to begin editing.

- Once on the Landing Page for your copied course, select Turn Editing On and begin editing the content. Ensure to remove all content and titles related to the original course content and update as relevant to the new course topic/title.
- Once the course is constructed and ready for use, Users can be enrolled directly into the course by selecting Users > Enrolled Users > Enroll Users.
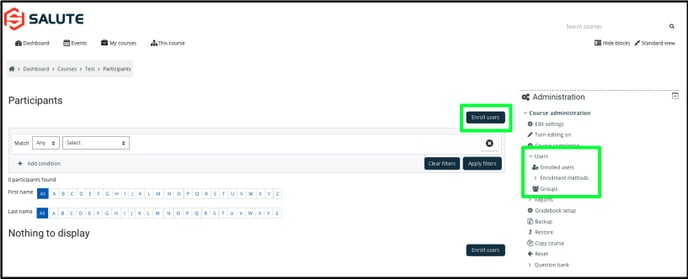
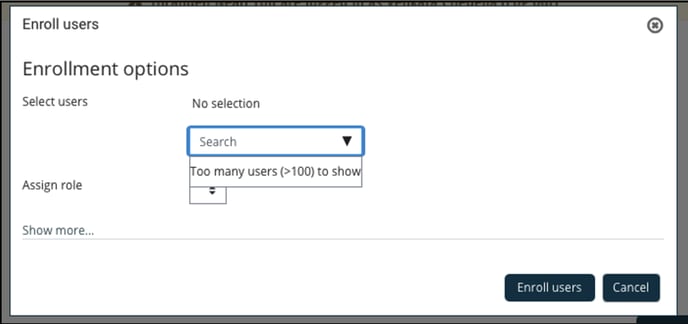
- Within the Enroll Users screen, search for the participants to be enrolled in the course.
NOTE: Enrollment can also be managed through User Enrollments on the IOMAD Dashboard. Reach out to Support@Salute to support the addition of any Profile questions or cohorts for more automated enrollment.
Creating Quizzes
One of the Activities that can be added to a Course is a Quiz. LMS Managers have access to create and edit quizzes and their associated questions.
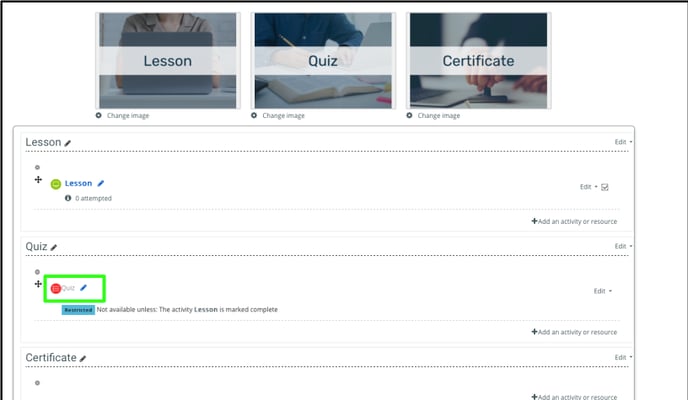
- Find the Course with the desired Quiz to edit and Turn Editing On from the right hand Course Administration menu.
- Once in Editing view, click into the Quiz Activity.
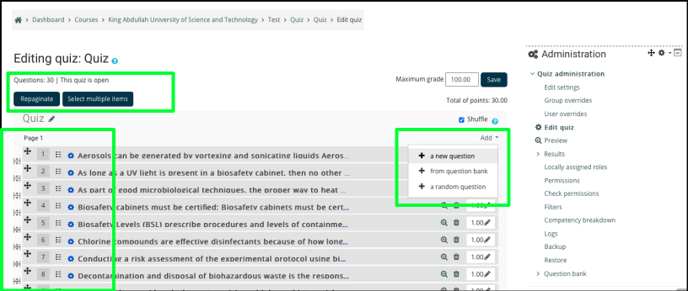
- Once in the Quiz view, select Edit Quiz from the right hand Quiz Administration menu.
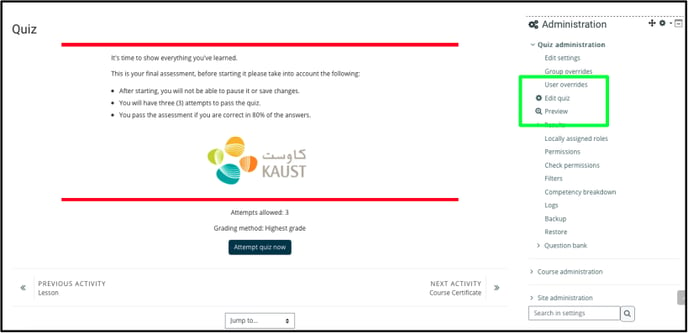
- Once in the Quiz Editing View, Quiz questions can be edited, added, or removed using the various functions available.
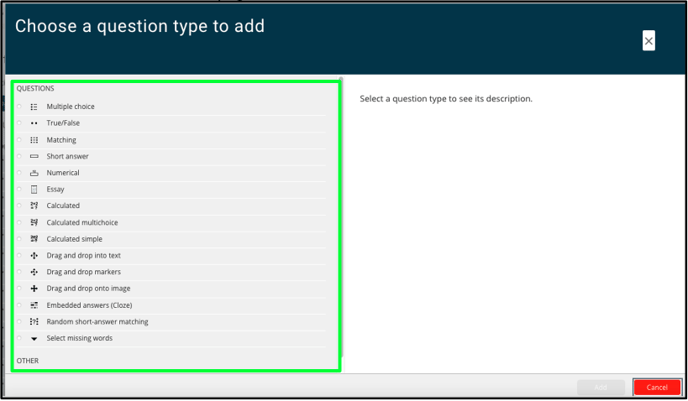
- When adding a new question, multiple answer types are available. Select the most relevant and move to the next page.
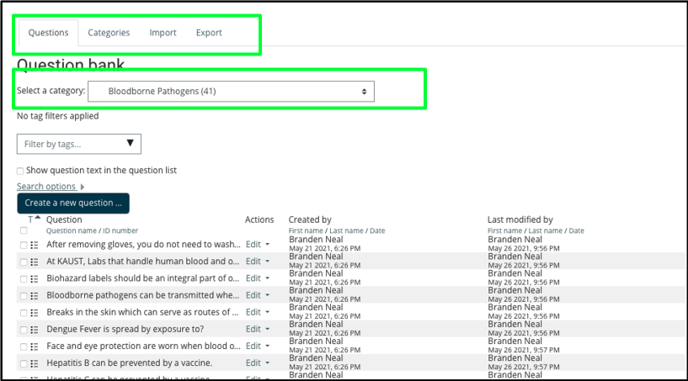
- When adding a new question, ensure to select a relevant Question Category within your list of available categories, create a new category from the Categories tab.
- Once your question(s) has been added, return to the course to add them onto the Quiz activity.
NOTE: Questions can be uploaded in bulk using the Import tab. If using the Import function, ensure to follow the format and file type requirements exactly for a successful import. Reach out to Support@Salute for further assistance with bulk question imports.
Resetting Quiz Attempts
In the event that a student exceeds number of Quiz Attempts permitted, an LMS Manager can reset their attempts.
- Locate the desired course where the attempts will be reset and click into the Quiz Activity.
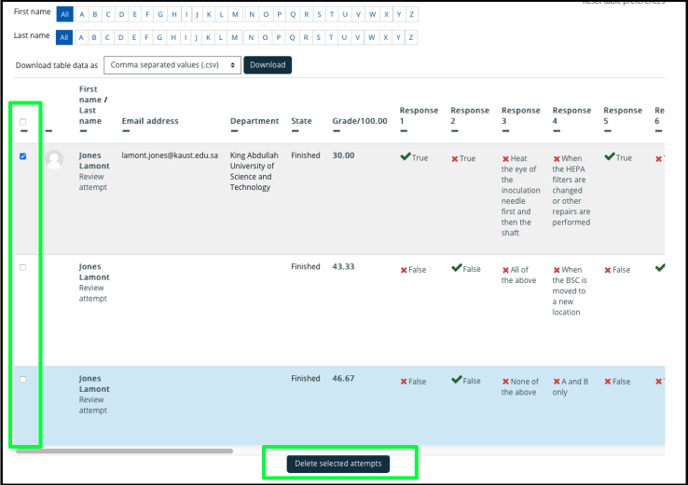
- From the Quiz Administration menu on the right hand side, click into Results > Responses.
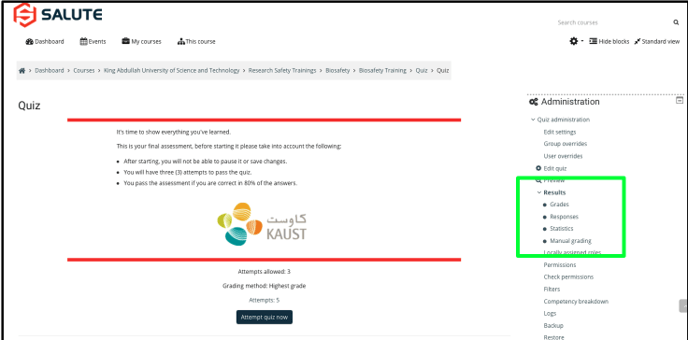
- Scroll down to the list of attempts. Search for the User whose attempts being reset and check off the desired deletions using the checkboxes on the right hand side. Once selected, click Delete selected attempts to remove them. This will allow the User to again attempt the Quiz to the set limit.
Embedding Forms
A form or other resource can be embedded into an Activity within a Course as needed.
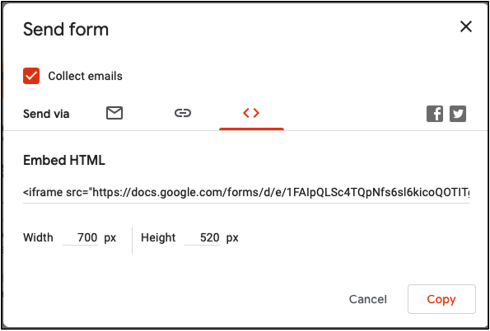
- To embed a form, retrieve the embed code from the source of the form i.e., if using a Google Form, Publish the Google Form for public view, and request the embed code. Note, the below image is a Google embed screenshot (not Salute).
- Upon copying the embed code, go the the LMS Course that where the form will be embedded.
- Once in the Course, ensure to Turn Editing On.
- Within the Section that you are going to embed the form, select Add activity or Resource.

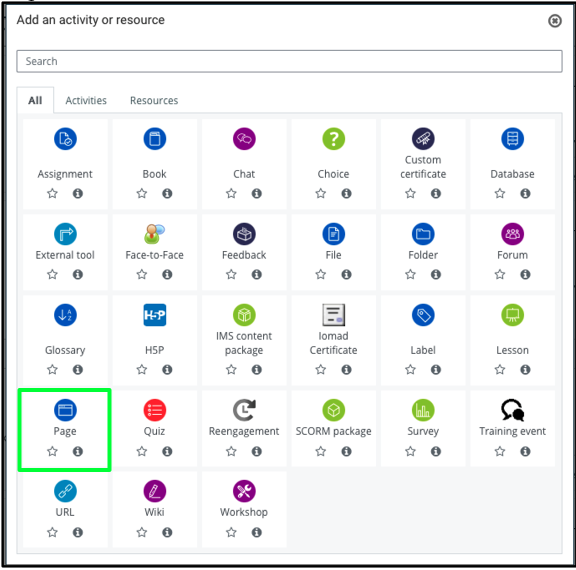
- A pop up window will appear prompting to choose a type of activity or resource, choose Page.
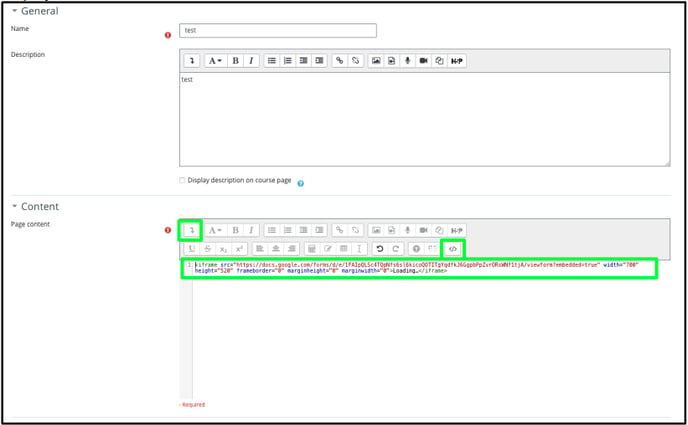
- In the next window, fill in the Name and Description fields as needed.
- In the Content section, select the Down Arrow to show all settings options. Once all options are displayed, select the Embed button (</>). Paste the embed code copied from the form source into the text field. Unclick the Embed (</>) button and the form should display.
- Save as needed and adjust Activity Settings (e.g., Activity Completion, Restrict Access) as needed for the course.
Embedding Slide Deck
A Slide Deck or other resource can be embedded into an Activity within a Course as needed.
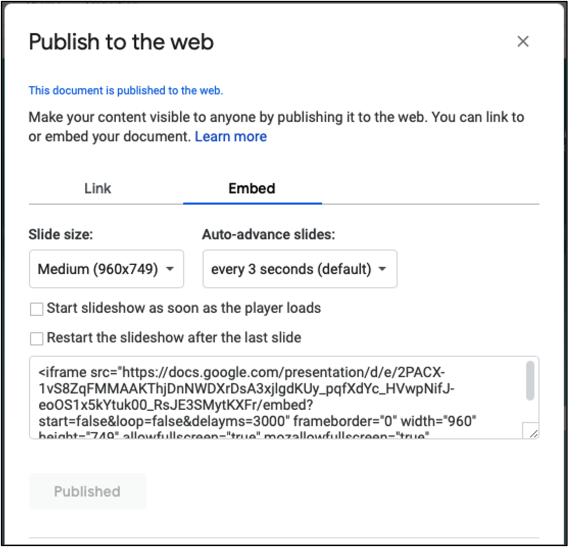
- To embed a Slide Deck, retrieve the embed code from the source of the form i.e., if using Google Slides, Publish the Google Slides for public view, and request the embed code. Note, the below image is a Google embed screenshot (not Salute).
- Upon copying the embed code, go the the LMS Course that where the form will be embedded.
- Once in the Course, ensure to Turn Editing On.
- Within the Section that you are going to embed the form, select Add activity or Resource.

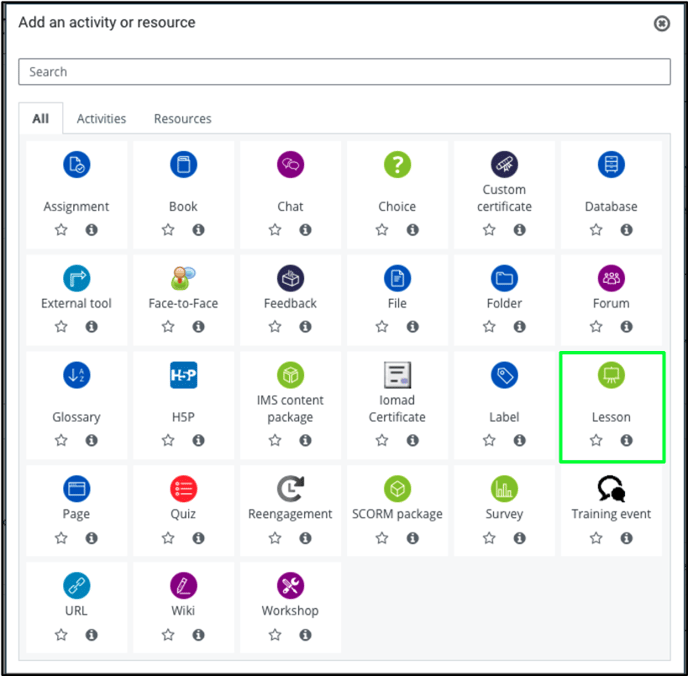
- A pop up window will appear prompting to choose a type of activity or resource, choose Lesson.
- Enter a Name and Description (along with any other settings applicable in this screen that are preferred) and click Save and Display.
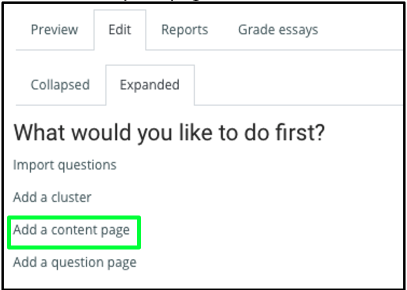
- On the subsequent page, select Add a Content Page.
- On the subsequent page, provide a Title for the content page.
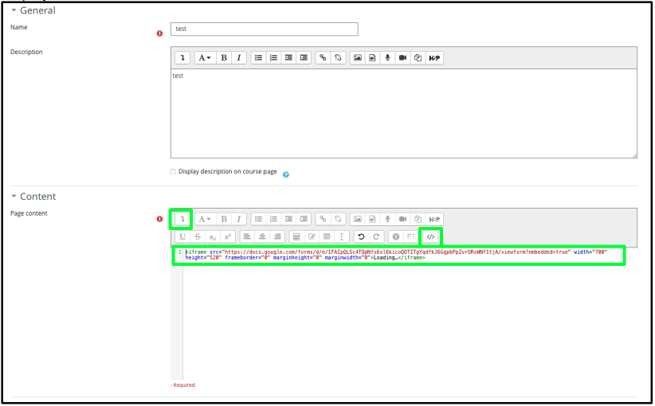
- In the Content section, select the Down Arrow to show all settings options. Once all options are displayed, select the Embed button (</>). Paste the embed code copied from the Slide source into the text field. Unclick the Embed (</>) button and the form should display.
- Upon Saving, the embedded Slide Deck will Display on the Activity Page.
Making a Course Available to Participants
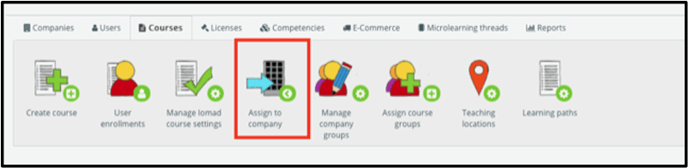
Once a course has been created, one last step of assigning the course to the company is required to make the course available in the Course List to end users/potential participants. This can be completed by a User with permission to the “Assign to Company” button under the IOMAD Courses tab.
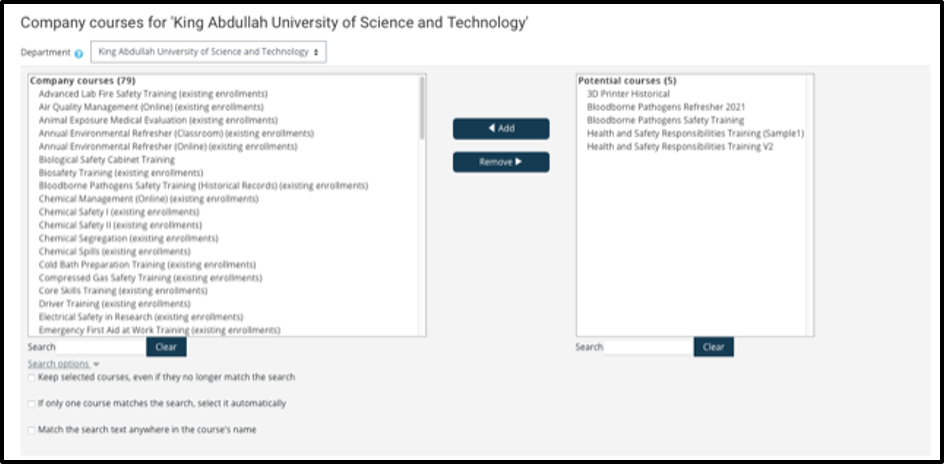
- When the course is ready to be made available, from your IOMAD Dashboard, click into the Courses tab, and select “Assign to Company”.
- On the following screen, you will see a list of Company courses and a list of Potential Courses. Your newly created Course will appear on the Potential Courses list. Select the course that you want to make available to potential enrollees from the Potential Courses list, and click the Add button in the center of the screen. This will make the Course available on the Course List.